Showing posts with label PWP. Show all posts

Wednesday, June 9, 2010

Stamping with friends

Last week I had some ladies over to make birthday cards - it was a lot of fun and made a nice break to my substituting schedule. (The phone started ringing this morning at 5:15 but today I finally said no - I need a day to catch up on my chores, clean the chicken coop, get milk and I am volunteering at the school today too).

Here is one of the masculine cards we made - I told you I'm loving the Sea Stamps set! This one was inspired by a card I saw on the Embellish Magazine blog.


Card Materials:
Stamps: Sea Stamp, Happy Birthday (retired)
Accessories: TAC Kraft cardstock, black cardstock, watercolor paper, black embossing powder, Noir palette ink, Tombow markers, aquabrush, buttons, Nestabilities

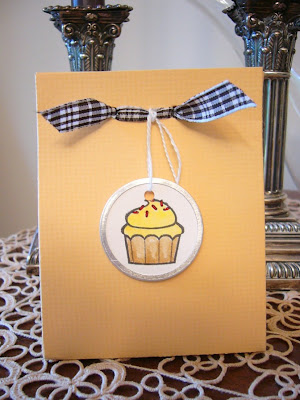
The other card has lots and lots of glitter...chunky glitter on top of the cupcake and stickles around the outside. I'm not always a sparkly type of gal but this card just screamed for it and I think it turned out so cute. This cupcake is one of the Purchase with Purchase stamps that you can get for just $2.95 from The Angel Company. It's the cutest little thing and has a wonderful ice cream cone in the set and two smiley faces.


Card Materials:
Stamps: All Smiles
Accessories: My Minds Eye polka dot paper, TAC brown cardstock (this is really a nice dark brown). chunky glitter, Stickles, watercolor pencil and Dove blender pen

Hope you are in the middle of a terrific week!!

Thursday, August 13, 2009

Open House Fun!

Thanks to all who were able to stop by! If you don't live locally and you know me...you will remember that I like to have a raffle (now called blog candy!) for those of you not close enough to come to my Open Houses and participate in my drawings there. Phew! That was one long sentence but bottom line: Check out the blog candy at the end of this post!

Here are some of my projects featuring our new Purchase with Purchase stamps:


I made these little albums using supplies from The Angel Company! Did you realize that we carry such a variety of paper, album kits, Bind it All and wires, acrylic covers, flowers, ribbon, and the scor pal? And that's just to name a few things that I used here!


This bottom album (with the belly band), the Natalee Accordion Kit, is a twist on how to put it together and I'm featuring it as a class...I still have room for two more if you are interested! Also coming in September/October I have a 5 birthday cards for $5 class and a really, really exciting class that I created with the Willoughby Soar with it Collection. It features 12 cards, each using a tag from the tag sheet that comes in the paper set. I'm so pleased that my samples really got some oohs and aahs!

And now for the "goods"!! You have until midnight, Sunday (16 Aug) to post below to enter my blog candy. I've got two very sassy sets, some white scrappers floss and a mini album kit using Cha Cha for you to put together.

Wednesday, July 22, 2009

Last Hostess Club meeting...

This week I'm having my last hostess club meeting - until we start up in September again that is! If you happen to read this and live close by, I'd love to have you join us since I had two slots open up. I run my clubs where we meet for 10 months, there are 10 members and we have to order $10 worth of product. Each person gets to be the hostess one month, specials are raffled off to the group, and we get together and have fun each month!

For our last project, I followed a super tutorial I found on Amy Rohl's blog...but leave it to one of my members and friends, Juliet, to come up with a special way to do it. She wanted to have two of the totes stuck back to back and she figured out how to do it all with one sheet of 8.5 x 11 inch paper. Juliet is a master a paper folding and easily wrapped her head around this project...I'm a bit slower and have to follow directions!

Here is Juliet's version of cutting two totes from one sheet! If you have 12 x 12 paper you can easily cut it down to 5 x 11 inches which is in Amy's original tutorial.


You should be able to click on it to see the dimensions easier. The lines with the double dash are cut lines, the sections with X are to be cut out and discarded, and the other lines just score on your handy-dandy Scor Pal (I love mine!) and fold.

I almost didn't have any stamping on it but I think these little sayings from The Angel Company new Purchase with a Purchase stamps are perfect for mini gift tags. Here's my tote:


I've had this Christmas Die Cut with a View paper pack for almost 7 years and have used maybe one sheet! Time to use it up, right?!? Please let me know if you get stuck on this project - it's really quite simple and this box is the perfect container for any little gift!